Back to School KDP Interior: What You Need to Know Before Creating Your Low-Content Book
If you are exploring the low-content publishing space on Amazon KDP, you have likely come across the phrase “Back to School KDP Interior.” At first glance, it sounds simple enough: a blank journal or notebook interior designed around a school theme. But there is a surprising amount of depth to these products, and many creators end up with results that fall short of their expectations. Whether you are a first-time publisher or someone with a few titles already live, understanding what makes a good interior—and what commonly goes wrong—can save you time, money, and frustration.
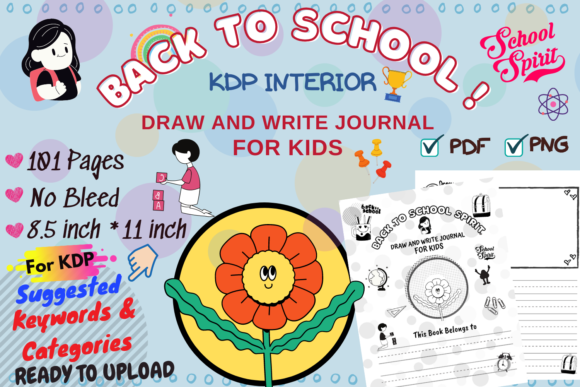
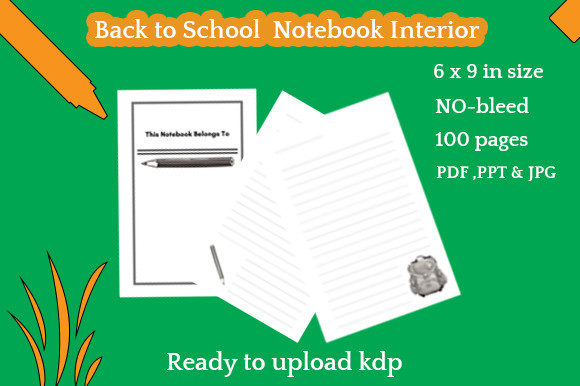
The specific product we are looking at here is a blank journal KDP interior sized 6×9 inches with no bleed, 100 pages, and several different page styles. It comes as one PDF, one PPT (PowerPoint), and two JPG files. The PPT file is editable, which gives you the flexibility to modify the interior to suit your own needs. That editable feature is a big deal, but it is also where many people make their first mistake.
The Mistake of Overlooking the Editable File Format
Many beginners grab the PDF and assume that is all they need. They upload it directly to KDP, hit publish, and hope for the best. But here is the catch: if you want to tweak anything—change a header, adjust a margin, add your own prompts, or even modify the page styles—the PDF is not your friend. PDFs are essentially locked files. They are great for final output, but terrible for customization.
That is where the included PPT file becomes your most valuable asset. Because it is editable, you can open it in PowerPoint (or a compatible program) and make changes directly. Want to add a line for a date? Done. Want to swap out a decorative element? Easy. Want to create a version with guided prompts for younger students? You can do that too. Ignoring the PPT file means you are leaving most of the product’s potential on the table.
Better approach: Start with the PPT file every time you want to create a variation. Make your edits there, then export a fresh PDF for upload. That way, you keep the original PDF as a clean reference and only work from the editable version. It is a simple workflow change that gives you complete control over your final product.
Ignoring the “No Bleed” Specification
This is one of the most common technical mistakes in KDP publishing. The product clearly states “NO bleed,” yet many creators still set up their files with bleed margins out of habit or confusion. When you select “no bleed” on KDP, the trim size and the content area are the same. If you accidentally include extra space meant for bleed, your content will get cut off during printing.
For this 6×9 inch interior, the no-bleed specification means your content should fit exactly within that 6×9 inch area. If you try to modify the PPT file and add images or borders that extend to the edge, you will run into trouble. KDP will either reject your file or produce a printed book where elements are missing along the edges.
Better approach: Before you start editing, confirm your software is set to 6×9 inches with 0 inch margins for bleed. Keep all content at least 0.25 inches away from the edge as a safety buffer, even though the official spec says no bleed. This small habit prevents headaches later. Also, when you export from PPT, choose “Standard” (not “Widescreen”) and set the slide size to exactly 6 by 9 inches.
Choosing the Wrong Page Styles for Your Audience
This interior includes several different page styles, which is a huge advantage. But many creators fall into the trap of using only one style throughout the entire book. While that is not necessarily wrong, it often results in a product that feels repetitive and less useful for the end customer.
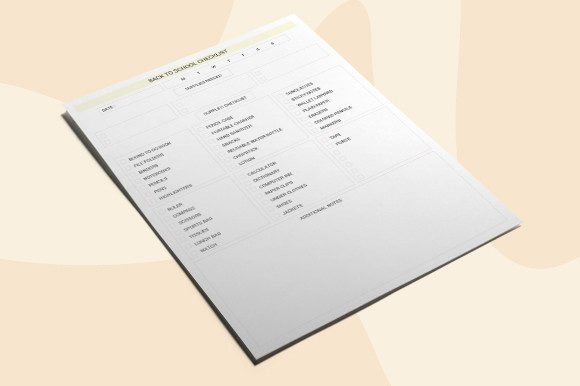
Think about who might buy a back-to-school journal. It could be a student wanting to track homework and class notes. It could be a teacher planning lessons. It could even be a parent organizing school schedules for multiple kids. Each of these users has different needs. A student might want pages with wide lines and a spot for doodles. A teacher might prefer a more structured layout with sections for objectives and materials. A parent might want checklists and weekly grids.
Better approach: Look at the variety of page styles included in your interior and mix them thoughtfully. Start with a weekly overview page, then follow with a lined page for notes, then a dot grid page for diagrams, then a checklist page. This variety increases the perceived value of your book and makes it more likely that a customer will find it useful every day, not just once. If you are creating a series, you can also use the PPT file to rearrange the order of the page styles to create different versions for different audiences.
Underestimating the Value of a Well-Structured Interior
A blank journal is not simply a stack of blank pages. If it were, customers could just buy a cheap notebook from any store. What makes a KDP interior worth buying is the structure. The page styles, the layout, the readability, and the overall flow all contribute to whether a customer feels like they got value for their money.
One common mistake is leaving the interior exactly as is, without adding any table of contents, page numbers, or section dividers. While the product comes with multiple page styles, it is up to you to present them in a way that makes sense. A teacher flipping through a 100-page journal with no page numbers will quickly get frustrated. A student trying to find last week’s notes without any section markers will feel the same.
Better approach: Use the PPT file to add simple navigation aids. Add page numbers at the bottom of each page. If the interior has distinct style groupings, insert a simple divider page between them—just a page with a title like “Notes” or “Plans” and maybe a small decorative element. This takes very little time but dramatically improves the user experience. A well-structured interior also reduces the likelihood of negative reviews, because customers can actually use the book as intended.
Failing to Customize the Interior Properly
Here is where many creators either overdo it or underdo it. Overdoing it means adding too many elements that clutter the page: multiple fonts, heavy graphics, borders that distract. Underdoing it means making zero changes and uploading the exact template as is, which results in a product that looks generic and blends in with thousands of others.
Both approaches hurt your sales. A cluttered interior feels unprofessional and can actually make the book harder to use. A generic interior gives customers no reason to choose your version over someone else’s. The goal is to find a balanced middle ground where you add enough personality to make the book recognizable, but keep the pages clean and functional.
Better approach: Start by examining the original page styles in the PDF. Notice what is already there—maybe a subtle header or a small icon. Then open the PPT file and make small, deliberate changes. Change the header font to something slightly more distinctive but still readable. Add a single accent color (like a soft blue or green) to headers or borders, but keep the main content black and white for printing cost. Add a line at the bottom for “Name” and “Date” on each page if it is not already there. These small touches make the book feel customized without overwhelming the user.
Also, keep in mind that the interior is designated “for kids or adults.” That means you have two very different audiences. If you are targeting adults, keep the design clean and minimal. If you are targeting kids, you might add slightly more playful elements—but always test whether those elements still leave enough space for writing. A kid who cannot fit their letters inside the lines will not enjoy the journal.
What to Check Before You Publish
Before you upload your final PDF to KDP, take a few moments to verify the basics. First, double-check the trim size. It should be exactly 6 x 9 inches with no bleed selected in your KDP setup. Second, inspect your PDF page count. The product says 100 pages, but your edited version might have more or fewer if you added or removed pages. Make sure your final count matches what you list in your product description. Third, preview your book using KDP’s online previewer. Flip through every page to make sure no content is cut off and that all text is readable. Fourth, check that your file is in CMYK color mode if you used any color elements, or stick to grayscale to avoid unexpected printing costs.
One more thing: if you used the PPT file to make changes, make sure you export the PDF at high resolution (at least 300 DPI for images, though for text-heavy interiors, a lower resolution is often fine as long as it is crisp). A blurry PDF will look unprofessional and may lead to returns or poor reviews.
A Practical Workflow for Getting It Right
If you want to avoid the common mistakes above, here is a simple process you can follow for this specific interior:
- Open the PPT file and immediately save a copy with a new name (like “My Back to School Journal Editable”).
- Decide your target audience: kids, adults, or both? Let that guide your customization choices.
- Review all the page styles in the PPT. Choose how you want to sequence them. Add a divider page if needed.
- Make your edits: adjust headers, add page numbers, include a name/date line, and apply a consistent visual style.
- Export a PDF with the correct page size (6×9 inches) and no bleed settings.
- Open the PDF and manually check the first few pages and the last few pages for any layout issues.
- Upload to KDP, select “no bleed” in the setup, and use the preview tool to confirm everything looks right.
This workflow takes maybe an hour if you are new, but it gets faster with practice. The result is a polished interior that you can publish with confidence.
A back-to-school KDP interior like this one gives you a solid foundation, but the real value comes from how you use it. By avoiding the common pitfalls—ignoring the editable file, mismanaging bleed specs, using only one page style, neglecting structure, and over- or under-customizing—you can create a product that stands out in a crowded market. The customers you want are not just looking for blank pages. They are looking for a tool that helps them organize, plan, and create during the school year. Give them that, and you will have a book that sells well and earns positive reviews.