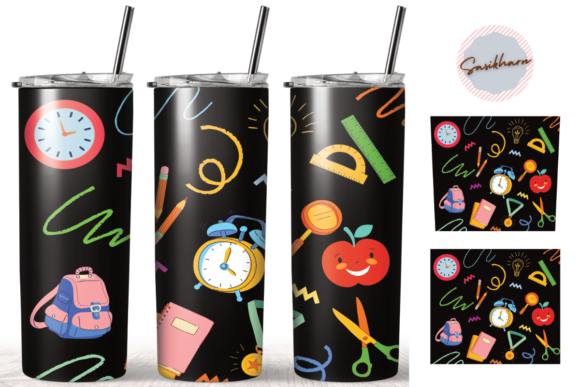
Back to School Skinny Tumbler 20 Oz: What to Check Before You Download, Print, and Press
If you create custom tumblers, you already know that a great design file makes the difference between a professional result and a frustrating miss. The Back to School Skinny Tumbler 20 Oz digital download promises convenience: a pre-sized wrap ready for sublimation. But even with a ready-to-use template, small mistakes can waste material, time, and money. Whether you are a beginner trying your first press or a seasoned seller adding seasonal inventory, here is what you need to understand before hitting download, and how to avoid the pitfalls that trip up even experienced creators.
What the Back to School Skinny Tumbler 20 Oz Actually Includes
This is a digital design bundle built specifically for a 20 oz skinny tumbler. You receive one ZIP file containing a straight PNG file and a tapered PNG file, both at 300 dpi high resolution. The template size measures 9.3 x 8.2 inches, which matches the standard printable area for this tumbler shape. Because the files come pre-sized, you can open them in your design or print software and send them directly to your sublimation printer without manual resizing—assuming you have the right setup.
What you do not get are mockups or preview images. The download contains only the print-ready design files. That is a common point of confusion for buyers who expect to see exactly how the wrap will look on a tumbler before they press. Understanding this upfront saves you from disappointment and helps you plan your production flow correctly.
Mistake One: Assuming Pre-Sized Means No Adjustments Needed
It is easy to think that a file labeled "ready to use" will print perfectly and wrap flawlessly on any 20 oz skinny tumbler. In reality, tumbler dimensions vary slightly between manufacturers. A file sized at 9.3 x 8.2 inches assumes a specific circumference and height. If your tumbler is a fraction of an inch wider or taller, the design may not align edge to edge, or the seam might shift.
What to do instead: Always measure your actual tumbler before printing. Wrap a piece of plain paper around the cup and mark the overlap. Compare that measurement to the template dimensions. If your tumbler matches, proceed. If not, you will need to scale the design proportionally in your software. This step takes two minutes and prevents wasting a blank plus the printed transfer paper.
Mistake Two: Confusing Straight and Tapered PNG Files
The bundle includes both a straight PNG and a tapered PNG. These are not interchangeable, and using the wrong one ruins the alignment. A straight PNG is designed for a cylindrical tumbler where the top and bottom diameters are the same. A tapered PNG accounts for the slight narrowing that many skinny tumblers have from top to bottom. If you use the straight file on a tapered tumbler, the design will distort, especially near the bottom edge.
How to avoid this: Look at your tumbler. If the sides are perfectly vertical, choose the straight PNG. If the cup narrows toward the bottom, use the tapered file. When in doubt, test with a plain paper print first. Tape it around the tumbler and check the fit before committing to sublimation paper and heat.
Mistake Three: Overlooking the Resolution Requirements for Sublimation
The files come at 300 dpi, which meets the standard for crisp sublimation prints. However, resizing the design in your software can lower effective resolution if you scale it larger than the original. Beginners sometimes stretch a design to fit a slightly larger tumbler, not realizing that the pixels are being interpolated and the final print will look soft or pixelated.
Better approach: Keep the file at its original 300 dpi and 9.3 x 8.2 inch dimensions. If you need to adjust size for a different tumbler, scale down rather than up. Scaling down from 300 dpi maintains or increases effective resolution. Scaling up forces the software to guess at missing detail, which degrades quality. Also, confirm that your printer settings are set to 300 dpi and that you are not accidentally letting the printing software resample the image to a lower resolution.
Mistake Four: Forgetting That the ZIP File Needs Proper Extraction
This sounds basic, but it causes real problems. The ZIP file contains the straight and tapered PNGs. If you try to print directly from within the ZIP archive without extracting the files, some operating systems or printer drivers will compress or alter the image data. The result can be a print that looks fine on screen but comes out with color shifts, banding, or missing sections.
The fix: Extract both PNG files to a dedicated folder on your hard drive before opening them in any software. Do not print from within the archive. Do not print from a preview window. Work directly from the extracted, full-resolution files. This habit eliminates one of the most common causes of unexpected print failure.
Mistake Five: Misinterpreting "Instant Download" as a Finished Product
An instant download means you get the digital files immediately after purchase. It does not mean the design is ready to apply to a tumbler without any further steps. You still need to print the design onto sublimation transfer paper using sublimation ink, tape it securely to the tumbler, and apply heat and pressure with a convection oven, heat press, or mug press. Buyers who expect a physical decal or a printed wrap are often confused.
Why this matters: Understanding the full workflow prevents wasted materials and frustration. If you are new to sublimation, review the entire process before buying: designing or downloading, printing in reverse if needed, taping, pressing, and peeling. The Back to School Skinny Tumbler 20 Oz digital download simplifies the design step, but it does not automate the rest of the process.
Mistake Six: Ignoring Color Profiles and Printer Calibration
The PNG files in this download are RGB by default. Sublimation printers typically work best with CMYK or specific ICC color profiles. Printing an RGB file directly can produce colors that look washed out or shifted, especially with bright school-themed colors like yellow, red, or blue. The design might look vibrant on your monitor but come out dull on the tumbler.
Practical advice: Convert the PNG to your printer's preferred color profile before printing. If you use Sawgrass or another sublimation printer, load the corresponding ICC profile and soft-proof the colors in Photoshop or a similar program. Run a small test print on plain paper first to check color accuracy. This extra step is especially important with seasonal designs where customers expect specific hues for back-to-school themes.
Mistake Seven: Underestimating the Importance of Tape and Wrap Technique
Even with a perfectly printed design, poor application ruins the tumbler. The design must make firm, even contact with the tumbler surface during the entire press cycle. Gaps, wrinkles, or loose edges cause ghosting, faded spots, or blurred lines. Beginners often use too little tape or tape that peels off under heat.
What works better: Use heat-resistant tape designed for sublimation, and apply it every inch along the seam and at the top and bottom edges. Wrap the transfer paper tightly with no air pockets. If your tumbler press does not apply even pressure, consider using a silicone wrap or a heat-resistant band to hold the paper in place. Test with a small piece of scrap paper before committing your design.
Mistake Eight: Thinking All 20 Oz Tumblers Have the Same Shape
The term "skinny tumbler" generally refers to a narrower diameter than a standard tumbler, but the exact shape varies. Some have a straight wall, some taper, some have a slight ridge near the bottom. The Back to School Skinny Tumbler 20 Oz template is designed for a typical skinny tumbler profile, but if your tumbler has an unusual curve or a raised band, the design may not conform properly.
How to check: Look at side-view photos or product specs for the tumbler blanks you plan to use. Compare the shape to the template dimensions. If you are buying tumblers from a bulk supplier, order one first to test. Sellers who skip this step end up with a stack of printed transfers that do not fit their blanks.
Making the Most of This Digital Download
The Back to School Skinny Tumbler 20 Oz design bundle is a solid resource for creators who understand the full sublimation workflow. It saves you the time of designing from scratch and gives you a high-resolution starting point. But like any tool, it works best when you pair it with good practices: measure your tumbler, choose the correct straight or tapered file, maintain 300 dpi through your print pipeline, extract files properly, and master your pressing technique.
For sellers, this kind of seasonal design can help you offer fresh inventory quickly. Parents and teachers looking for back-to-school gifts appreciate custom tumblers with school colors, pencils, apples, or inspirational phrases. By avoiding the common mistakes above, you can produce clean, vibrant finished products that sell well and build your reputation for quality. Take the time to test, measure, and calibrate before you go into full production. That preparation is what separates a smooth workflow from a costly do-over.
Whether you are creating one tumbler for your own use or fifty for a local school fundraiser, the same principles apply. Check your blanks, verify your file settings, and never assume that "pre-sized" means universal. With a careful approach, this digital download becomes a reliable shortcut instead of a source of frustration.